Introduction:
There's something inherently captivating about gathering around a fire pit. The flickering flames, the comforting warmth, and the ambient glow create an inviting atmosphere that draws people together. However, achieving the perfect blend of warmth and style requires more than just setting up a basic fire pit. Mastering fire pit installation techniques involves careful planning, thoughtful design, and attention to detail. In this article, we'll explore the key steps and considerations for creating a fire pit that not only provides heat but also enhances the aesthetics of your outdoor space.
Choosing the Right Location:
Before diving into the installation process, it's crucial to select the perfect spot for your fire pit. Consider factors such as safety, convenience, and ambiance. Ideally, the location should be away from any flammable materials, such as overhanging trees or bushes. Additionally, ensure there's ample space around the fire pit for seating and circulation.
Furthermore, think about the views from different vantage points in your outdoor area. Positioning the fire pit to take advantage of scenic vistas or focal points can elevate the overall ambiance. Whether it's overlooking a garden, a pond, or the city skyline, the right location can enhance the enjoyment of your outdoor space.
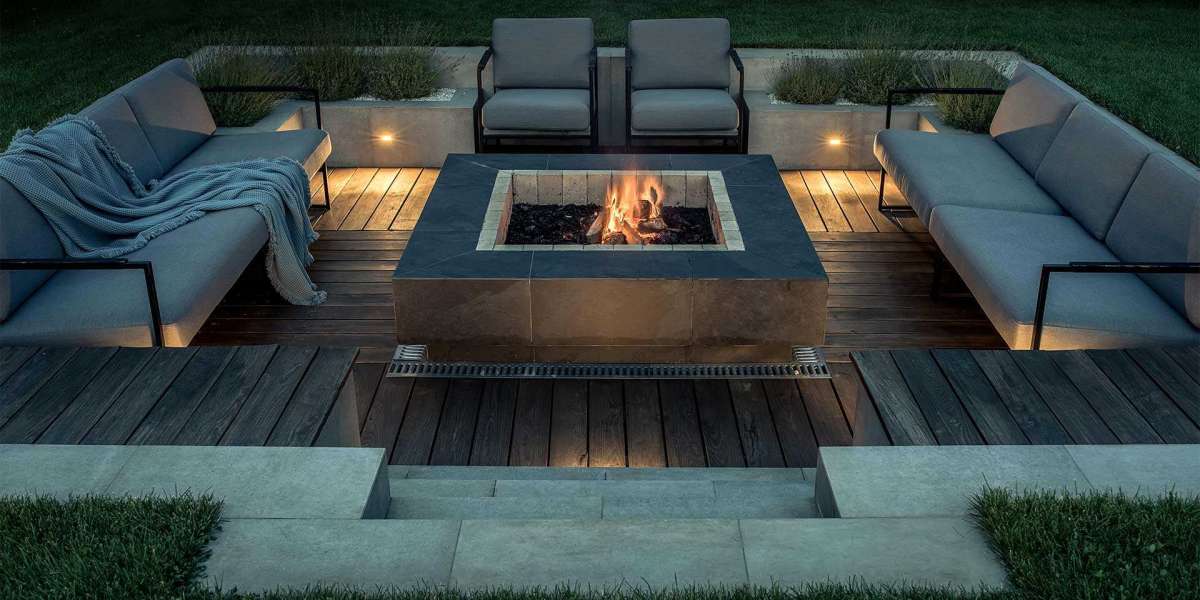
Selecting the Type of Fire Pit:
Fire pits come in various shapes, sizes, and materials, each offering its unique aesthetic appeal and functionality. Some popular options include:
Traditional Wood-Burning Fire Pits: These classic fire pits provide an authentic experience with crackling flames and the scent of burning wood. They're typically constructed from materials like stone, brick, or metal and offer a rustic charm that complements outdoor settings.
Gas Fire Pits: Gas fire pits are a convenient alternative to wood-burning ones, offering clean-burning flames at the flick of a switch. They're available in a range of designs, from sleek and modern to traditional and rustic. Gas fire pits are often preferred for their ease of use and maintenance.
Portable Fire Pits: Ideal for smaller outdoor spaces or camping trips, portable fire pits offer flexibility and convenience. They're lightweight, easy to set up, and can be moved around as needed. Portable fire pits come in various designs, including bowl-shaped, tabletop, and chimney-style models.
Consider your preferences, lifestyle, and budget when choosing the type of fire pit that best suits your needs. Additionally, check local regulations and fire codes to ensure compliance with safety standards.
Preparing the Site:
Once you've selected the type of fire pit, it's time to prepare the site for installation. Here are the essential steps:
Clear the Area: Remove any debris, vegetation, or obstacles from the chosen location to create a clean, level surface for the fire pit. This will help prevent accidents and ensure proper ventilation around the fire.
Check for Utilities: Before digging or installing any fixtures, check for underground utilities such as gas lines, water pipes, or electrical cables. Contact your local utility companies or use a utility locator service to mark the location of these utilities to avoid accidental damage.
Create a Base: Depending on the type of fire pit, you may need to create a stable base to support the structure. For wood-burning fire pits, a base of gravel or sand can help improve drainage and prevent heat damage to the ground below. Gas fire pits may require a concrete pad or paver base for stability and safety.
Installing the Fire Pit:
With the site prepared, it's time to install the fire pit according to the manufacturer's instructions. Here's a general overview of the installation process for different types of fire pits:
Wood-Burning Fire Pit Installation:
a. Place the first layer of fire bricks or stones in a circle to form the base of the fire pit.
b. Stack additional layers of bricks or stones, alternating the placement for stability.
c. Use a level to ensure the fire pit is evenly balanced and adjust as needed.
d. For added safety, consider lining the inside of the fire pit with fire-rated bricks or a steel ring to contain the flames.
e. Fill the bottom of the fire pit with a layer of sand or gravel to improve drainage and protect the base.
Gas Fire Pit Installation:
a. Follow the manufacturer's instructions for assembling the gas burner and ignition system.
b. Place the burner assembly in the center of the fire pit and connect it to the gas supply line.
c. Test the gas connections for leaks using a soapy water solution and adjust as needed.
d. Cover the burner assembly with fire-rated decorative media such as lava rocks, glass beads, or ceramic logs to enhance the appearance of the fire pit.
Portable Fire Pit Installation:
a. Assemble the portable fire pit according to the manufacturer's instructions, ensuring all components are securely attached.
b. Place the fire pit on a stable, heat-resistant surface such as concrete, stone, or metal.
c. Add fuel, such as wood logs or propane canisters, according to the fire pit's specifications.
d. Light the fire pit following the manufacturer's guidelines and enjoy the warmth and ambiance it provides.
Enhancing the Aesthetics:
Once the fire pit is installed, consider adding decorative elements to enhance its visual appeal and complement your outdoor space. Here are some ideas to consider:
Seating: Arrange comfortable seating around the fire pit, such as Adirondack chairs, benches, or built-in stone seating. Provide ample cushions and blankets for added comfort and coziness.
Lighting: Incorporate ambient lighting around the fire pit to create a magical atmosphere after dark. Options include string lights, lanterns, torches, or LED strip lights installed along pathways or seating areas.
Landscaping: Surround the fire pit with landscaping elements such as flower beds, shrubs, or potted plants to soften the hardscape and add color and texture to the space.
Outdoor Décor: Personalize the area with outdoor décor items such as decorative fire pit covers, weather-resistant artwork, or fire pit cooking accessories like skewers, grills, and roasting sticks.
Conclusion:
Mastering fire pit installation techniques is the key to creating a warm and stylish outdoor gathering space. By carefully selecting the location, type of fire pit, and decorative elements, you can enhance the ambiance of your outdoor area while enjoying the comforting glow of a crackling fire. Whether you opt for a traditional wood-burning fire pit, a convenient gas model, or a portable design, the warmth and style it brings will undoubtedly elevate your outdoor living experience. So gather your friends and family, toast some marshmallows, and savor the moments shared around your perfectly crafted fire pit.